Lightwave Heads
Introduction
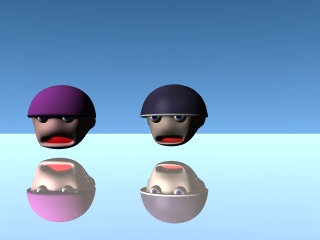
This tutorial shows you the steps to build a simple character head. By making only minor changes to the steps it is possible to produce a wide range of different characters but with the same look and feel.
The actual tutorial is for building the character in Lightwave 8, however the techniques and ideas shown should transfer to other 3D applications easily enough.
The original purpose for these character heads was as a set of computer opponents for a turn based strategy game. However, the finished characters can either be rendered out as an image or used as a low polygon count model for animation and display within a 3D environment.
The Principle Behind the Technique
As with many things in life, there is more than one way of achieving our goal. The idea behind this technique is to take a ball of virtual clay and mould it into a head and some head gear.
Note: Remember to save your work regularly as you progress through the tutorial. I suggest using a different file name each time (i.e. head 001.lwo, head 002.lwo, head 003.lwo) so that you can easily go back if you make a mistake or what to try different values.
The stages of moulding are as follows:
- Basic head shape
- Head gear
- Skin
- Ears
- Eye sockets
- Nose
- Mouth
- Eyes
The Head
First we will create the head shape.
Create a Box Primitive (Create tab or keyboard X) using the following numeric settings:
- Width: 1m
- Height: 1m
- Depth: 1m
- Center X: 0m
- Center Y: 0m
- Center Z: 0m
- Axis:Y
- Radius: 0m
- Radius Segments:1
- Segments X:1
- Segments Y:1
- Segments Z:1
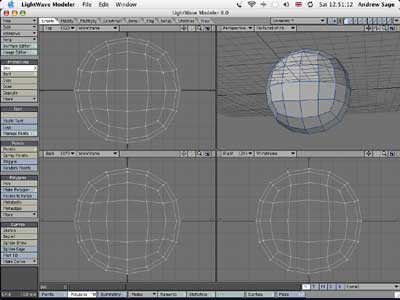
The next step is to turn this cube into our virtual clay for moulding. This is done by subdividing the polygons using the Metaform subdivision method.
Subdivide (Multiply tab or keyboard D) and use the following settings:
- Subdivision Method: Metaform
- Fractal: 0%
- Max Smoothing Angle: 179 degrees
Repeat this step.
You should now have roundish shape consisting of 96 polygons.
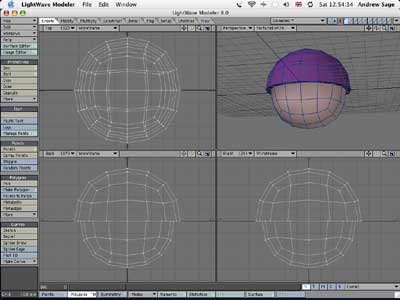
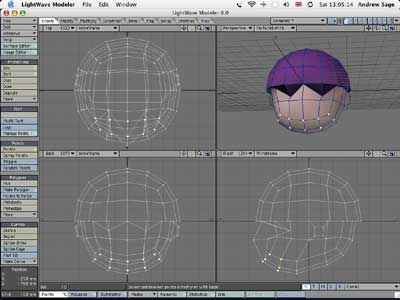
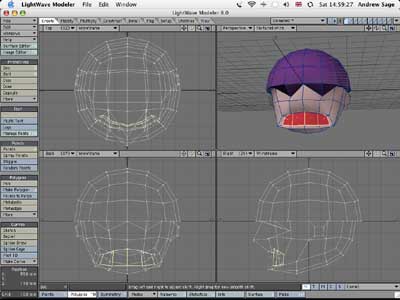
Head Gear
The character we are creating is some kind of solider so we will give him a helmet to wear.
Select all the polygons above the middle of the ball.
Set the Surface of the selected polygons to a new surface called Helmet. (Keyboard q). Set the colour to whatever you want the helmet to be. At this stage we are just creating the model so we are not interested what the actual surfaces look like for now. Time can be spent working on them later.
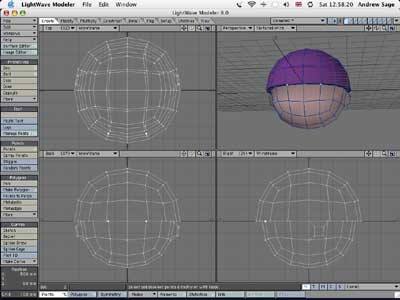
The helmet is not grafted directly on to our character's head so we need reduce the size of the head to give the impression that the helmet has some thickness.
Select the polygons below the middle of the ball. A quick way to do this is by using the Invert button (View tab or keyboard ") while the helmet polygons are still selected.
Set the surface of the selected polygons to a new surface called Inside Helmet.
Smooth Shift (Multiply tab or keyboard F) with the following numeric values:
- Offset: -20mm
- Scale: 100%
- Max Smoothing Angle: 100 degrees
Smooth Shift the polygons again but this time with an offset of -50mm.
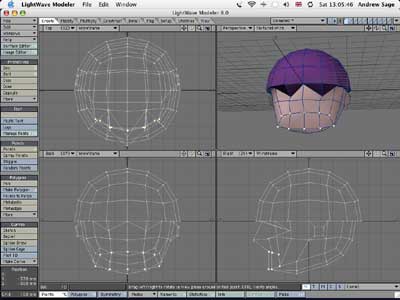
Skin
Set the surface of the selected polygons to a new surface called Skin.
Deselect the polygons.
You should now have a head with a helmet on top and a thin rim around the inside of the helmet.
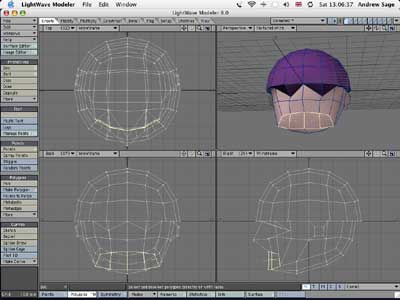
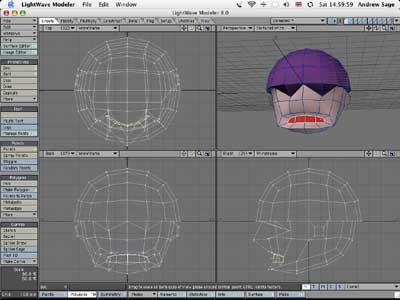
Ears
The next step we are going to do is give our character some ears.
Select the polygon below the horizontal centre line and behind the vertical centre line on both sides of the head.

We will make the ears stick out from the side of the head using the Bevel tool (Multiply tab or keyboard b). Use the following numeric values:
- Shift: 60mm
- +/- : 0m
- Inset: 40mm
- +/- : 0m
- Edges: Inner
Deselect the polygons.
Your character should now have a pair of ears.

Eye Sockets
Now that your character can hear, it is time to let them see or at least give them somewhere for their eyes to go.
Select the point either side of the vertical centre line along the horizontal centre line.
Move these points back into the head by using the Move tool (Modify tab or keyboard t).
Move them back -80mm in the Y axis and 200mm in the Z axis.

We will add the actual eyes to go in these sockets later on.
Nose
Next we will give our character a sense of smell. Select the centre point just below the eyes.

Move the point -100mm along the Z axis.

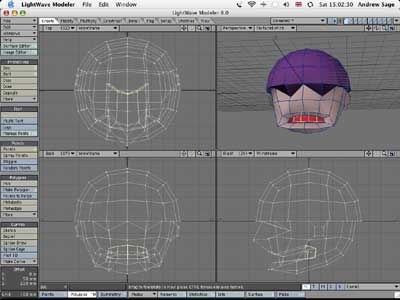
Mouth
Taste is the next sense we will give our character. Well to be truthful they will not be able to taste as we are not going to give them a tongue, but just a mouth.
In order to give them a mouth we first need to give them a jaw. Select the points at the lower front of the characters face. There should be a total of 15 points.
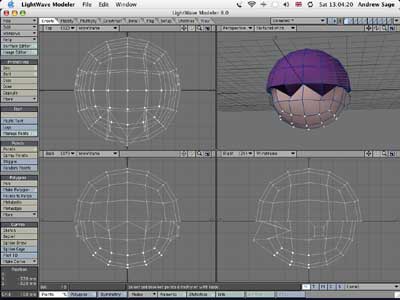
Move these points forward and down by the following amounts:
- Y axis: -50mm
- Z axis: -100mm
Deselect the right most 5 points.
Using the Rotate tool (Modify tab or keyboard y), rotate the points about -60 degrees around the centre of the group of points.
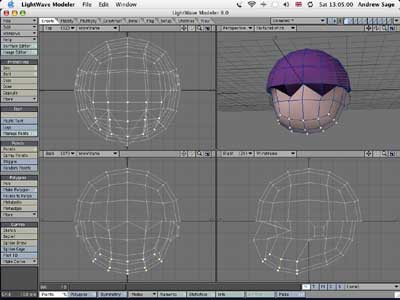
Deselect the points and then select the front 4 polygons where the mouth will go.
Smooth Shift the polygons with an offset of -50mm.
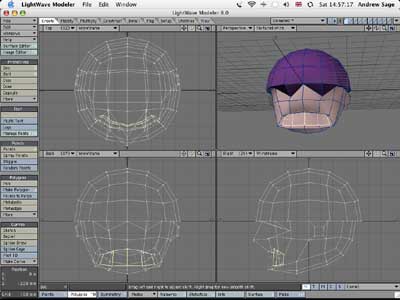
Set the Surface of the selected polygons to a new surface called Lips
Using the Stretch tool (Modify tab or keyboard h), stretch the selected polygons from the centre of the lips 80% horizontally and 50% vertically.
Smooth Shift the polygons with an offset of -50mm.
Move the selected polygons back into the head to fully form the mouth cavity.
Deselect all the polygons.
Your character should now being wearing a helmet and have ears, a nose, a mouth and a some eye sockets. Next it is time to give them sight.
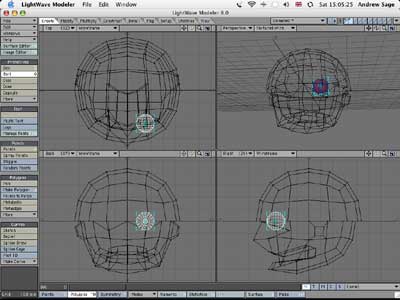
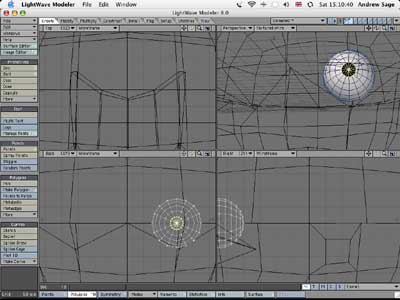
Eyes
We will create the eyes in a separate layer.
Display the head as a wireframe in the background of the eyes layer.
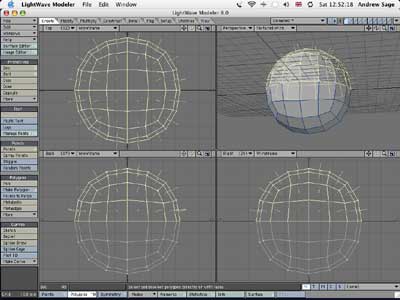
Create a Ball Primitive (Create tab or keyboard O) with the following numeric values:
- Type: Globe
- Axis: Z
- Sides: 16
- Segments: 12
- Centre X: 150mm
- Centre Y: 0mm
- Centre Z: -275mm
- Radius X: 75mm
- Radius Y: 75mm
- Radius X: 75mm
Set the Surface of the eye to a new surface called Eye Ball.
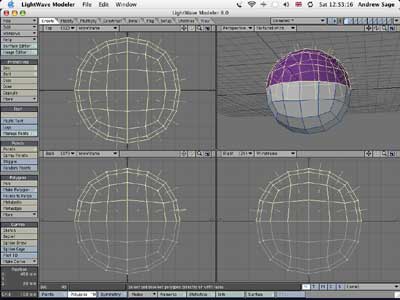
We created the ball along the Z axis so that we can use its polygons to create the iris and pupil for the eye.
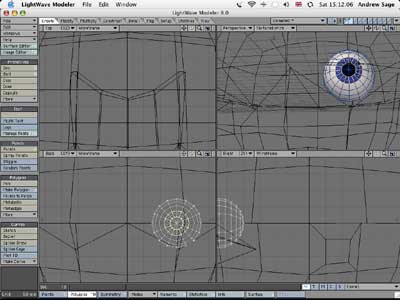
Select the centre 16 front facing polygons.
Set the Surface of the selected polygons to a new surface called Pupil.
Select the ring of polygons around the pupil and set their Surface to a new surface called Iris.
At present we have only one eye. We will use the Mirror tool (Multiply tab or keyboard V) to create the other eye. Use the following numeric values:
- Axis: X
- Center X: 0mm
- Center Y: 0mm
- Center Z: 0mm
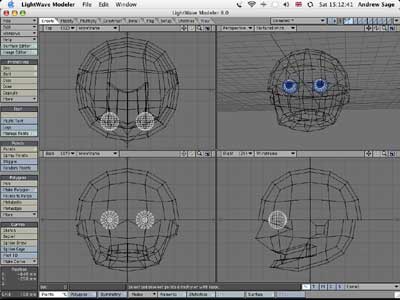
Now that we have the eyes created we have a couple of options. We could cut and paste them into the same layer as the rest of the head, or if you plan on animating the character later on then you can leave them in their own layer or even save out each of the eyes individually.
The approach taken here is to cut the eyes from their layer and paste them into the head layer.
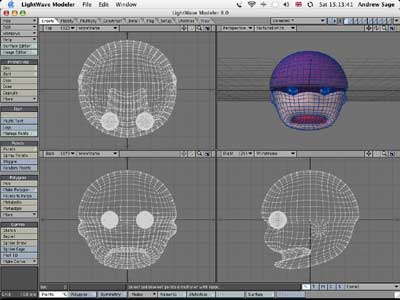
We now have the completed head.
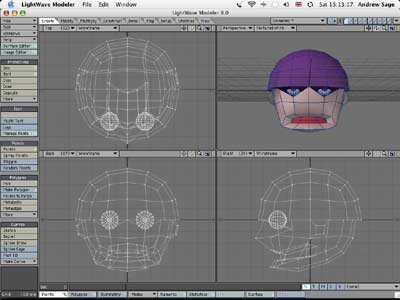
Rounding Out
As you can see our character currently looks very angular. If you plan on using the character in a 3D engine then this is fine. However the goal is to render the character as a still image and so we want things to look smoother.
We will convert the polygons to sub patches and then freeze them into lots of smaller, smoother polygons.
SubPatch (Construct tab or keyboard tab) the polygons.
Freeze (Construct tab or keyboard ctrl + D) the polygons.
Our character is now ready to be loaded into a Lightwave scene to be rendered.