From Little Acorns...
or
Taking Development a Step at a Time
By Andrew Sage
(This article first appeared on the CreateMacGames.org website.)
 One of the most common reasons that a hobbyist game project fails to ever be completed is that of trying to run before you can crawl, let alone walk. I am sure that all of us are guilty at some point of starting a project with grand ideas of creating the next best thing in gaming, without actually being able to carry it through.
In this article I aim to offer a possible path through the minefield of over-ambitious ideas and practices. Of course there is no right or wrong procedure in a subject such as this and I acknowledge that there are other routes, but personally I know this one works. I hope to provide some signposts both for those just starting out on their development journey and also to those who have stumbled around and almost given up in the past. Following the theories provided should help you to achieve the goal of having a completed, playable game, with the satisfaction that you have made it.
Throughout this article I will refer to the development of a hypothetical simple 2D, single screen per level, multilevel shoot ‘em game, a cut down version of Garden Pests, which was my uDevGame 2003 entry.
Small Steps
The first thing to do is to break the development up into small, workable stages. The completion of each stage lets you see that progress is being made.
Such stages for our hypothetical game would be:
- Basic engine – moving a block of colour around the screen.
- Adding on screen obstacles.
- Adding gravity and other simple physics.
- Add a level.
- Add aliens.
- Add a simple weapon.
- Shoot the aliens.
- Add a score.
- Add lives.
- Add simple graphics.
- Add game over screen.
- Add title screen.
- Add options screen.
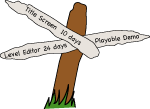
Beware The Title Screen Monster!
 At the very start of your project you could take a wrong turn and head off down the route of spending an inordinate amount of time developing the front end of the game, i.e. the title screen, options screen, etc. Title screens are magnets for wasting time. You can spend forever tinkering with graphics to create a great splash screen and before you know it weeks have passed. I’ve known developers who have a nice collection of title screens but then they lose interest or run out of time before they get anything substantial behind it.
However, if you are developing the title as part of a team, then this is a convenient place to split development tasks.
Simple Movement
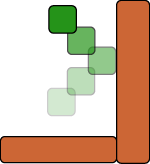
 First of all we need to get the very basics of the game engine working. Aim for something like a simple square moving around the screen via keyboard control.
At this stage it would be all too easy to add a frame rate counter and start getting concerned that you are not getting x hundred frames per second. As long as the on screen movement responds to your control, you do not need to worry about performance at this stage of development.
From here you can begin to build things up. First try adding walls to block the sprite’s path or for the sprite to bounce off. Next try adding gravity and other simple rules of physics.
This is the stage were thoughts such as, “I wonder what it would be like if I added another wall here, or another seven layouts as different levels?” may creep into your mind.
Level Editors
Level design may well lead you off track for a while or bring you face to face with one of the big time-eating monsters – The Level Editor! The Level Editor is a cunning creature; it takes you in with its ‘user-friendliness’ and its alluring promise of “I’m nice and easy for you to write”. However, once it is working, it turns around and bites you, as you end up spending all your time adding lots of tweaks and nice extra little features. Sure, those who end up using the editor and helping design your levels will thank you for those nice features, but how happy are they going to be when they discover that the 120 levels they have created are pointless because there is never going to be a finished game to play them in?The way around this is to hardcode your first level until you get everything working. At least with a hardcoded level you know where the problems are if it doesn’t work, instead of the added possibility of the problem being in data loading routines and other such things.
Of course, allowing someone else to write the level editor is an option. However, unless you have written a very detailed specification and are 100% sure you will not be changing anything, then it is far too early at this stage to be doing this. As you build your game engine it will evolve and at the early stages a simple change of ideas may change the whole fabric of the levels and their data.
Remember to keep using simple graphics or graphics from a previous game. At this stage of building your proof of concept engine, you don’t need to worry about what it looks like. Worrying about your graphics this early can lead you wandering around in circles forever.
Add some alien sprites to the game engine. Don’t worry about their interaction with the player for now. Remember to keep taking things in small stages that let you see you are making progress.
Add the ability to allow the player to fire some kind of simple bullet. Firepower is another area where you could easily wander off the path. The joy of seeing the first weapon working will no doubt get your mind racing about what other fancy weapons you could add. You could easily find yourself spending days adding more and more weapons firing bullets at different rates, in different directions and colours all over the place. Resist the temptation, because you can always go back and expand things later on when a solid game engine is working, or when you are waiting for feedback from any beta testers you may have been lucky enough to find.
Of course if you are working as a team then why not split the tasks here and let someone else work away on the additional weapons.
Add interactions between the aliens and the weapons and you should have a fun engine, which may steal some more of your time as you move around shooting everything that moves. Add in scoring and lives or energy for the player and you have a simple, but playable, game.
Now is the time to think of adding some graphics. Since the game actually works, it is very easy to see what the graphics look like in action. If you have someone doing the graphics for you, they can see straight away how their work looks and then they get that instant rewarding feeling too.
Title and Other Screens
At this stage you are at a crossroads. Do you go on expanding your engine and increasing the game play, or do you now turn your attention to the title screen? At this stage, I personally would move on to the title screen. By now your game has an ending when the player is killed, so it also requires a start. Just go for something simple for now. Also now would be a good time to add a simple options screen. Up until now the game controls would be programmed for your tastes, but adding the ability for the player to configure the controls as they desire will give your beta testers an easier time.A Little Sapling
By now you should a have a simple, but complete little game. From here you can go on expanding the individual areas already created and adding new features. However, remember to try and keep your game fully playable from now on. Always having the game playable means it is easier to let people try it out and give you feedback. Try not to overreach and add some exciting feature that causes everything else to break. Don’t be tempted to add something else before finishing the current feature you are developing.I hope this article has provided some useful advice and an insight in how you can ‘grow’ a game whilst avoiding the pitfalls that await the novice, and not so novice, game developer.
About the Author
Andrew Sage has been dabbling with games writing over the last 20 years on various platforms ranging from the Sinclair ZX Spectrum, Commodore Amiga, Windows, Palm and since February 2002, Mac OS X. During this time he has managed to complete a large percentage of projects started and even made a small amount of money selling some of his creations.
Article Copyright (c) 2004 Andrew Sage